Adding data disk to a Windows VM in Azure
When you create a Virtual Machine, it will come with an operating system disk that houses the operating software and other system files. The OS disk has a maximum capacity of 4,095 GiB while the data disk can reach up to 32,767 GiB. Managed disks are integrated with the availability sets to ensure that the VM disks are separated from each other in an availability set to prevent a single failure point.
To keep your files, large volumes of data such as media files, backup files and large databases you need a storage that is advisable to be a different disk for this purpose.
To add a data disk to a Windows VM on Azure can be done via the Azure portal, the Azure CLI, or the Azure PowerShell.
The steps highlighted here include adding the data disk through the Azure portal:
Step 1: Sign into your Azure account. Log into your Windows VM. Click here to access my blog on the creation of Windows VMs in Azure.
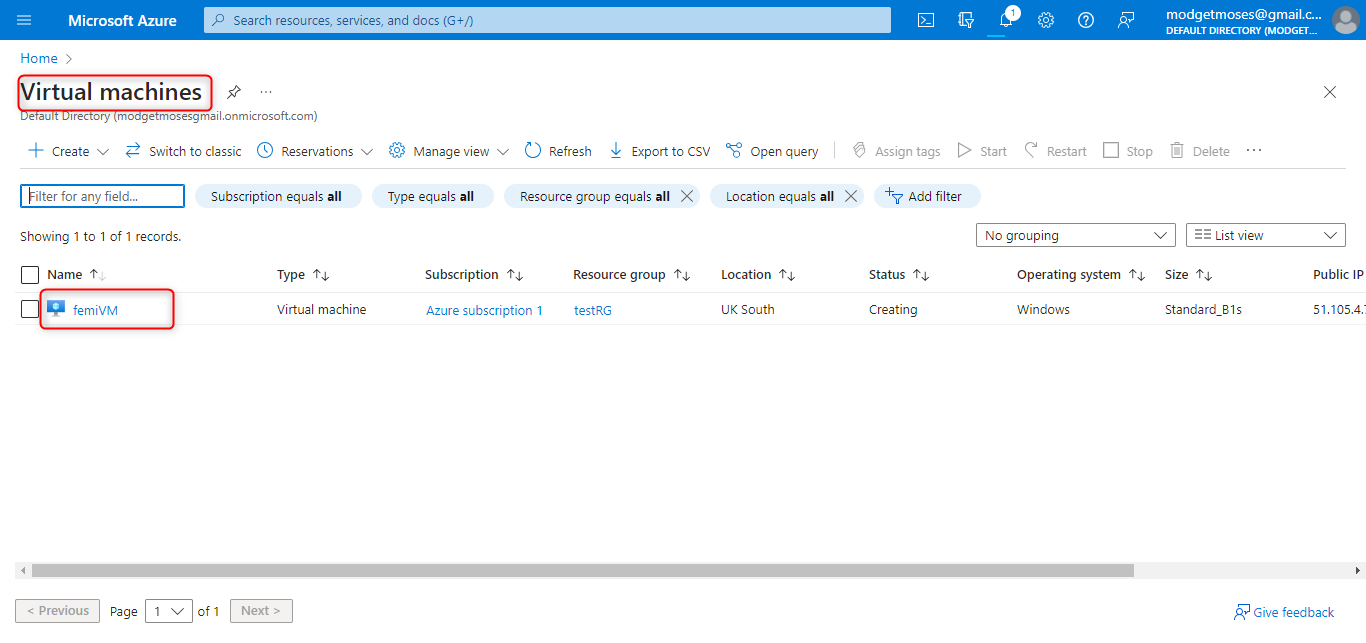
Step 2: Select the Windows VM in Azure portal as shown below
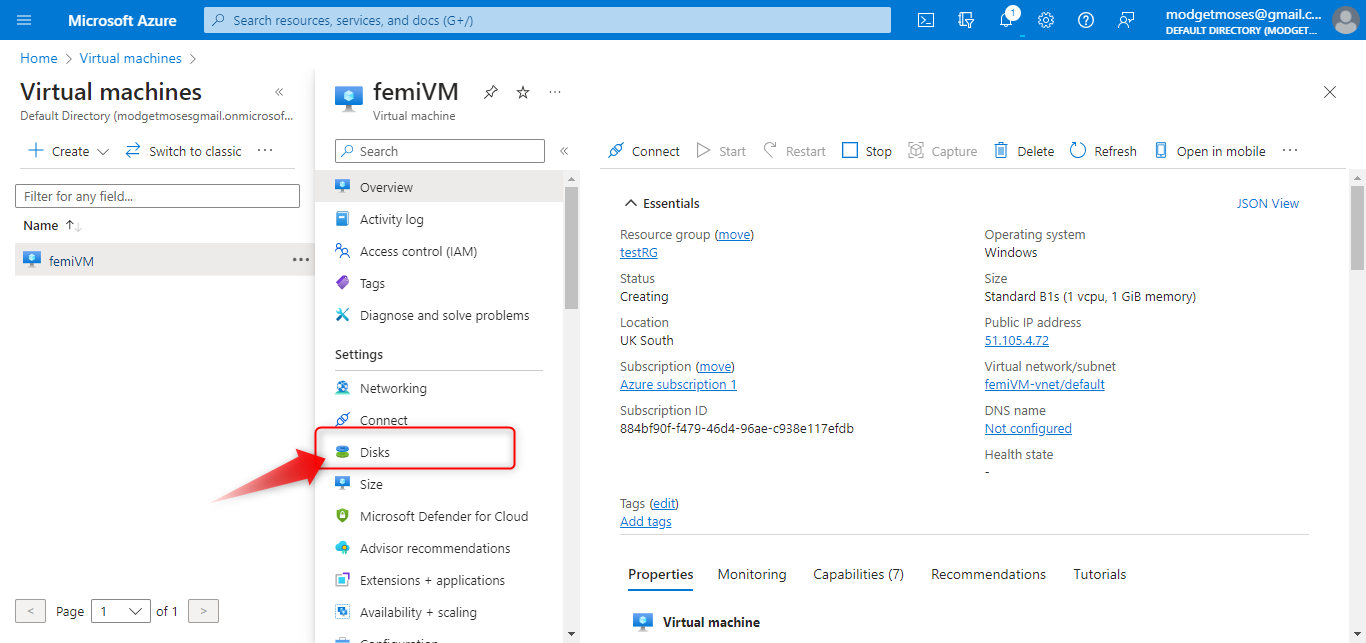
Step 3: Under setting select disk
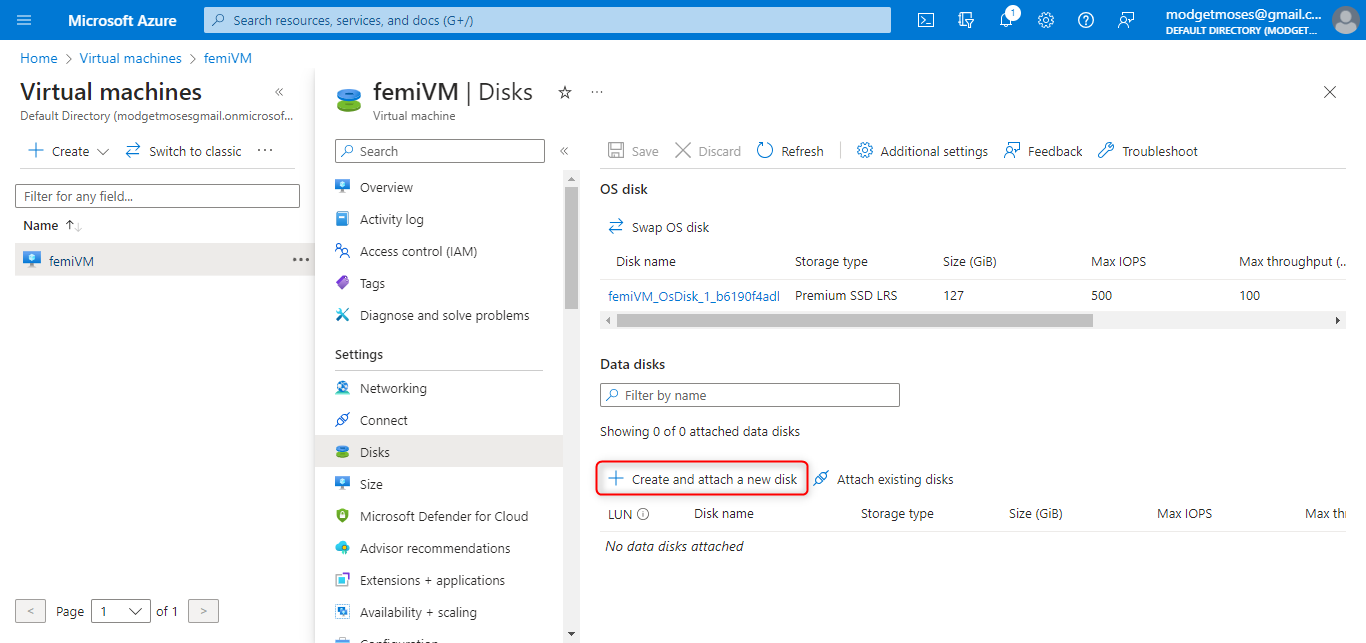
Step 4: Under Data disks select Create and attach a new disk
Step 5: Specify parameters for your data disk
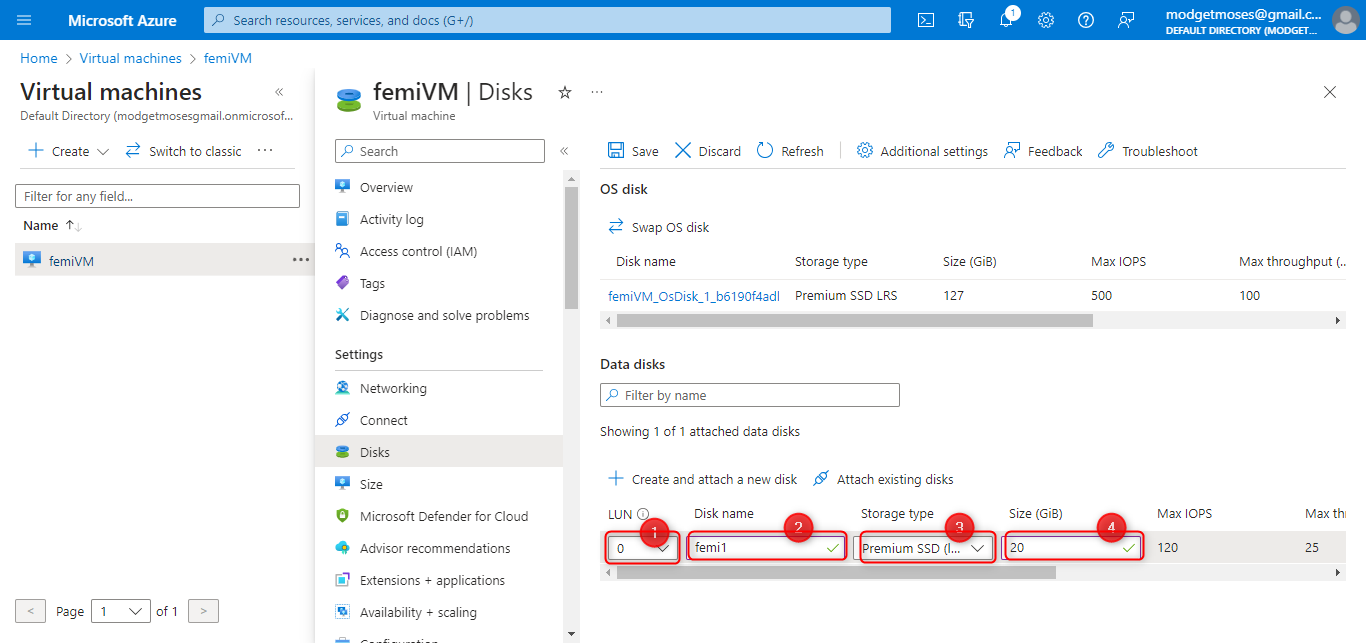
LUN : Logical unit number of the data disk. This value is used to identify data disks within the VM and therefore must be unique for each data disk attached to a VM.
Disk name: Specify as required
Storage type: You can select between the Premium SSD and Normal SSD.
Size in GB
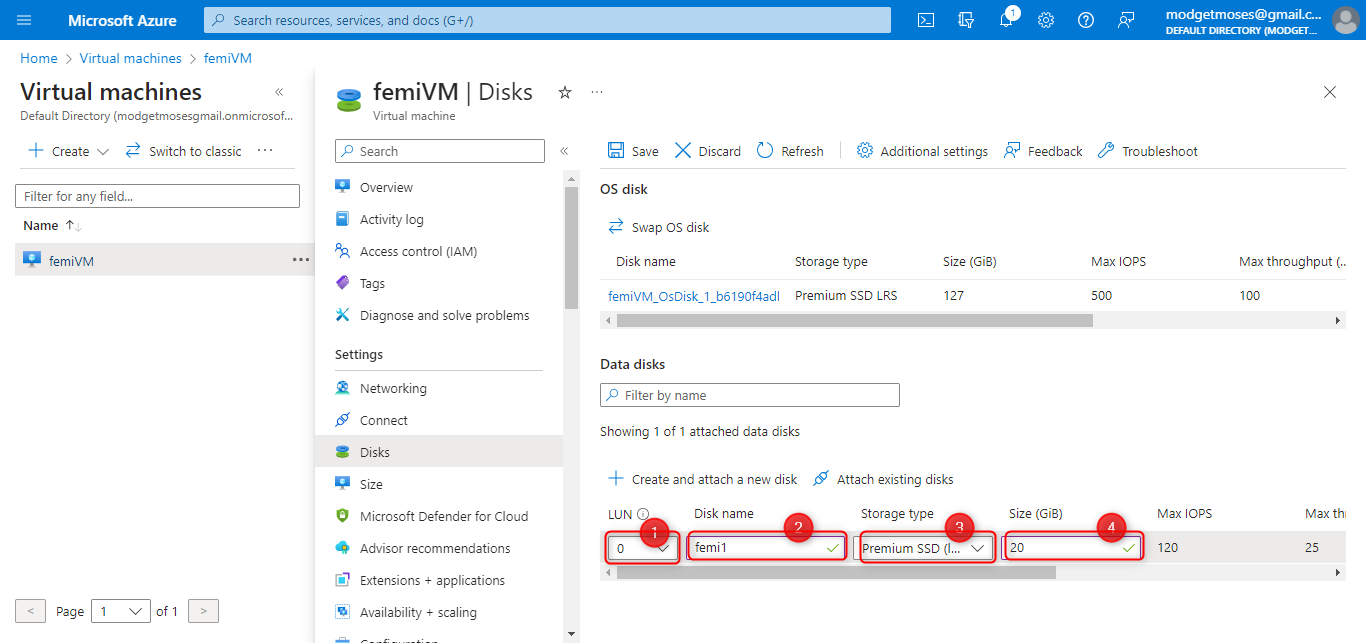
Step 6: Safe your data disk
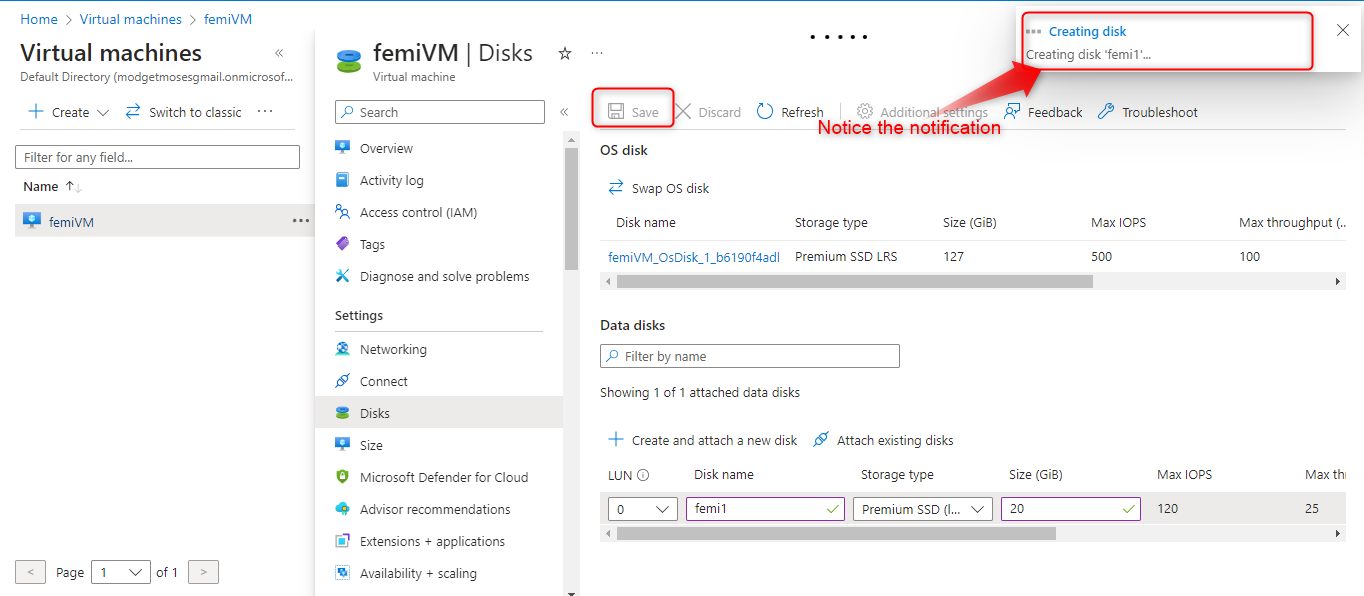
Now that you have you data disk succesfully created, you will need to access and prepare your disk for usage.
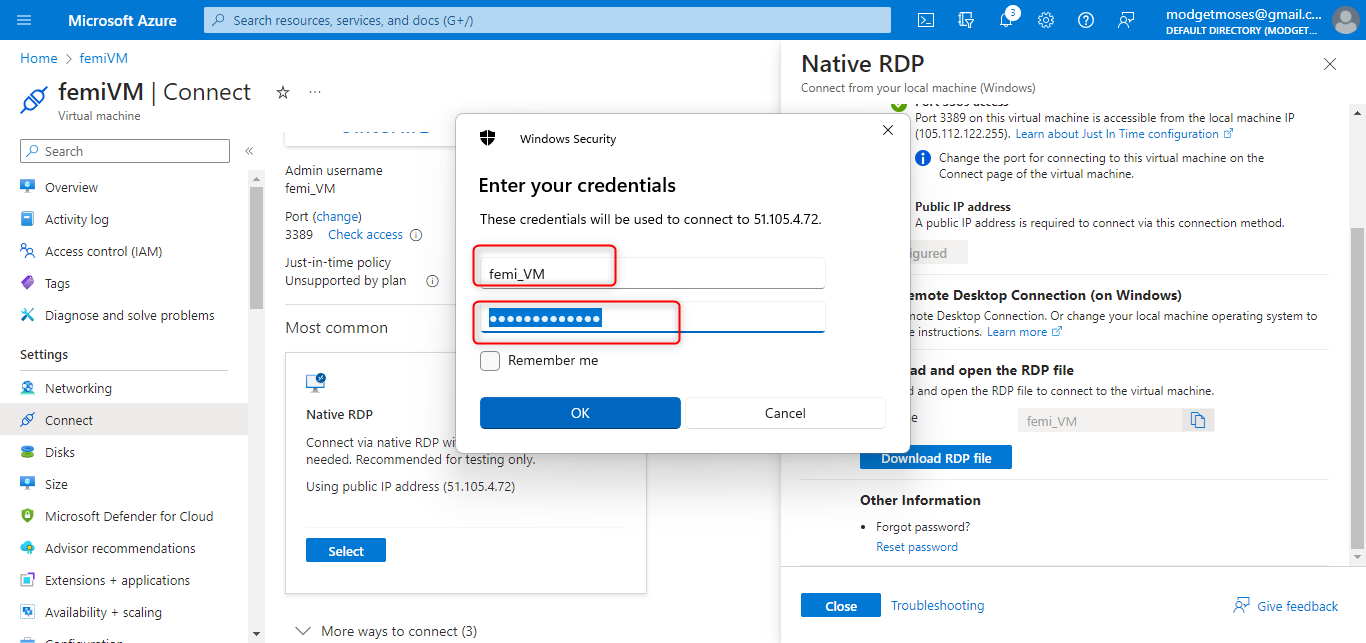
Step 8: RDP into your VM
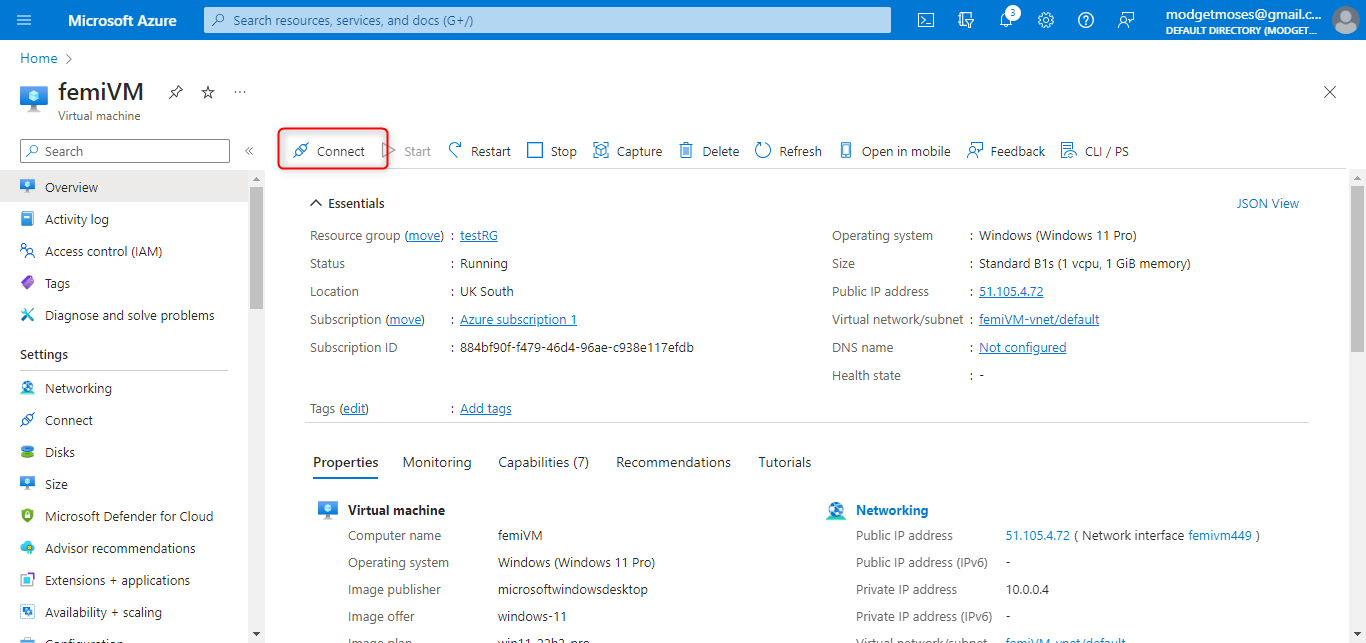
RDP means remote desktop protocol. From your Azure portal, select the VM with the data disk and click on connect as shown below
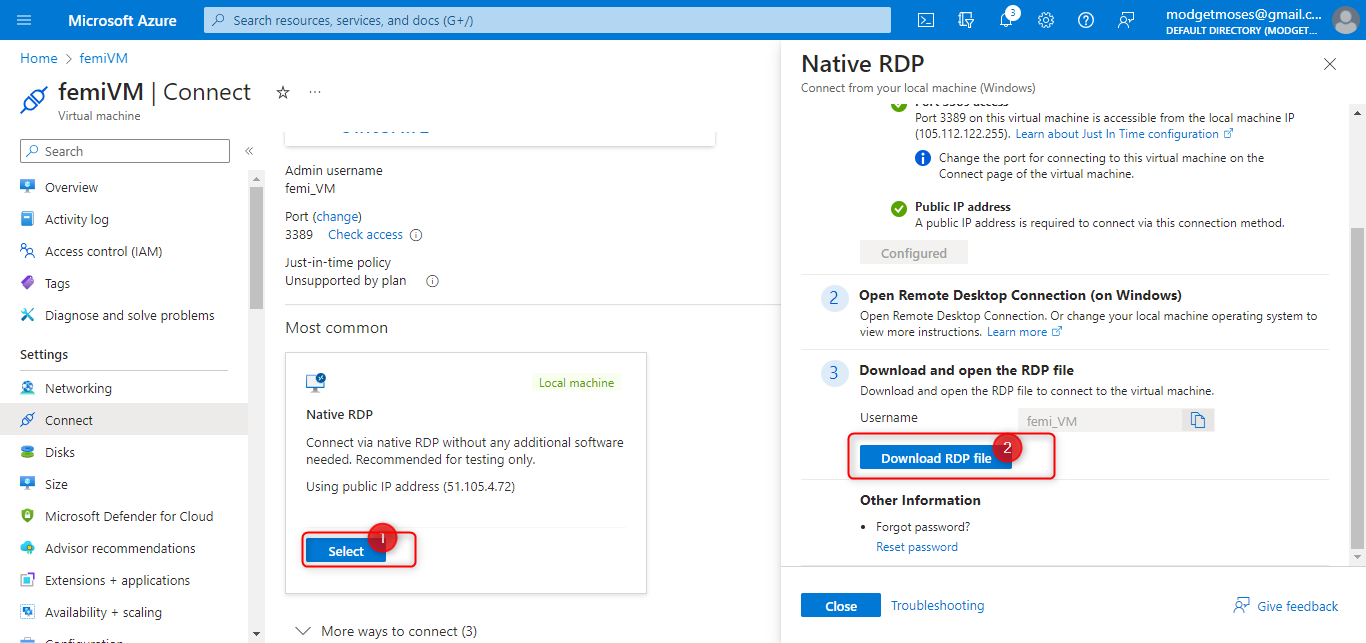
Then, click on select in Native RDP window and download RDP file.
Specify your username and password
Step 9: Prepare your new data disk for use
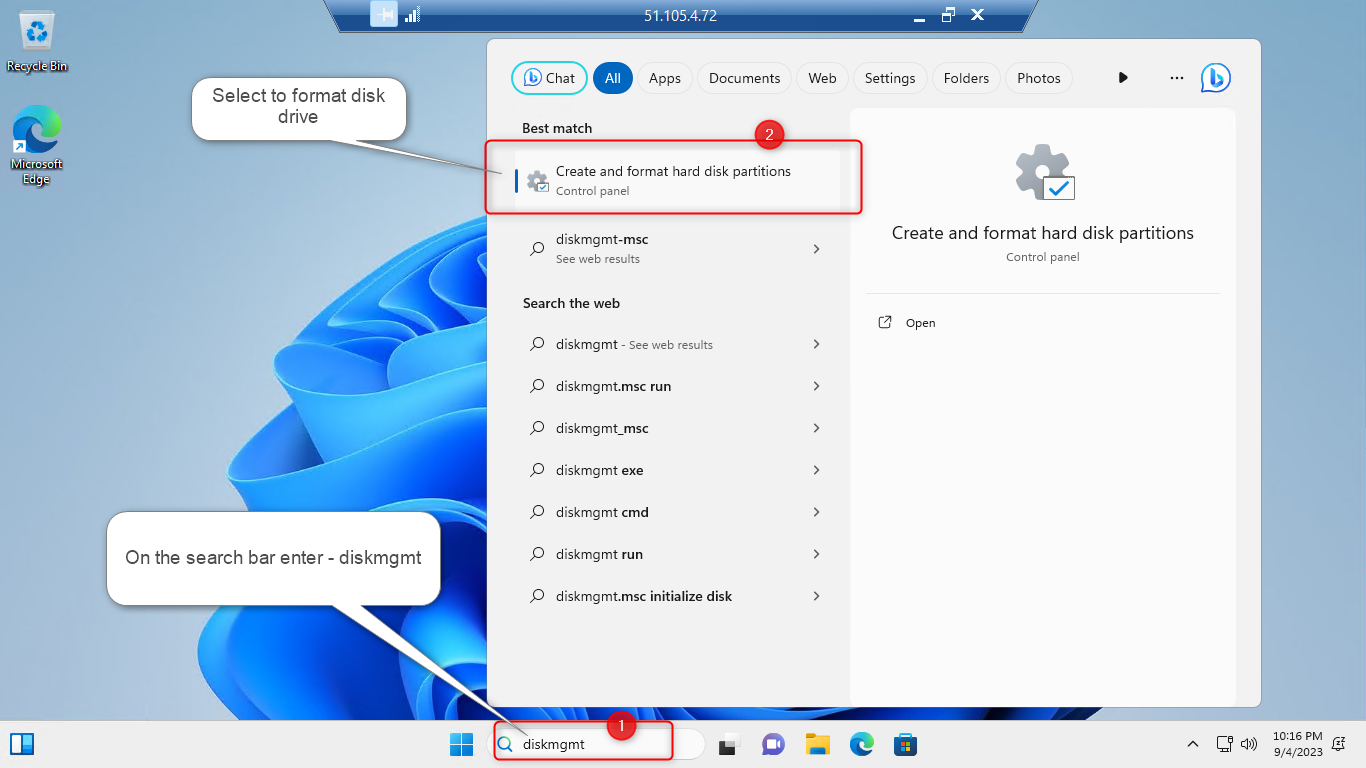
After you succesfully RDP into the virtual machine, on the windows search bar type diskmgmt, as shown in the diagram below.
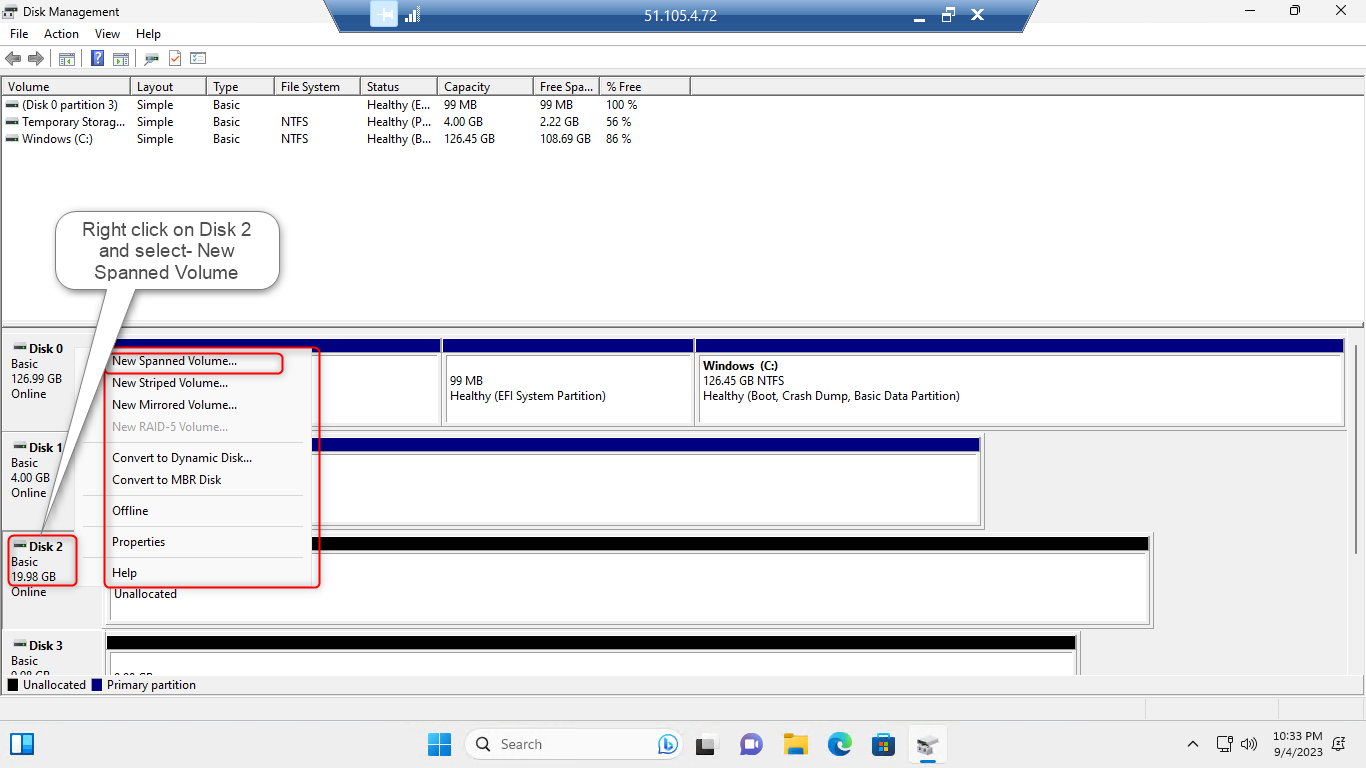
Expand the window to see your mounted disk, right click on it and select New spanned volume... as shown below
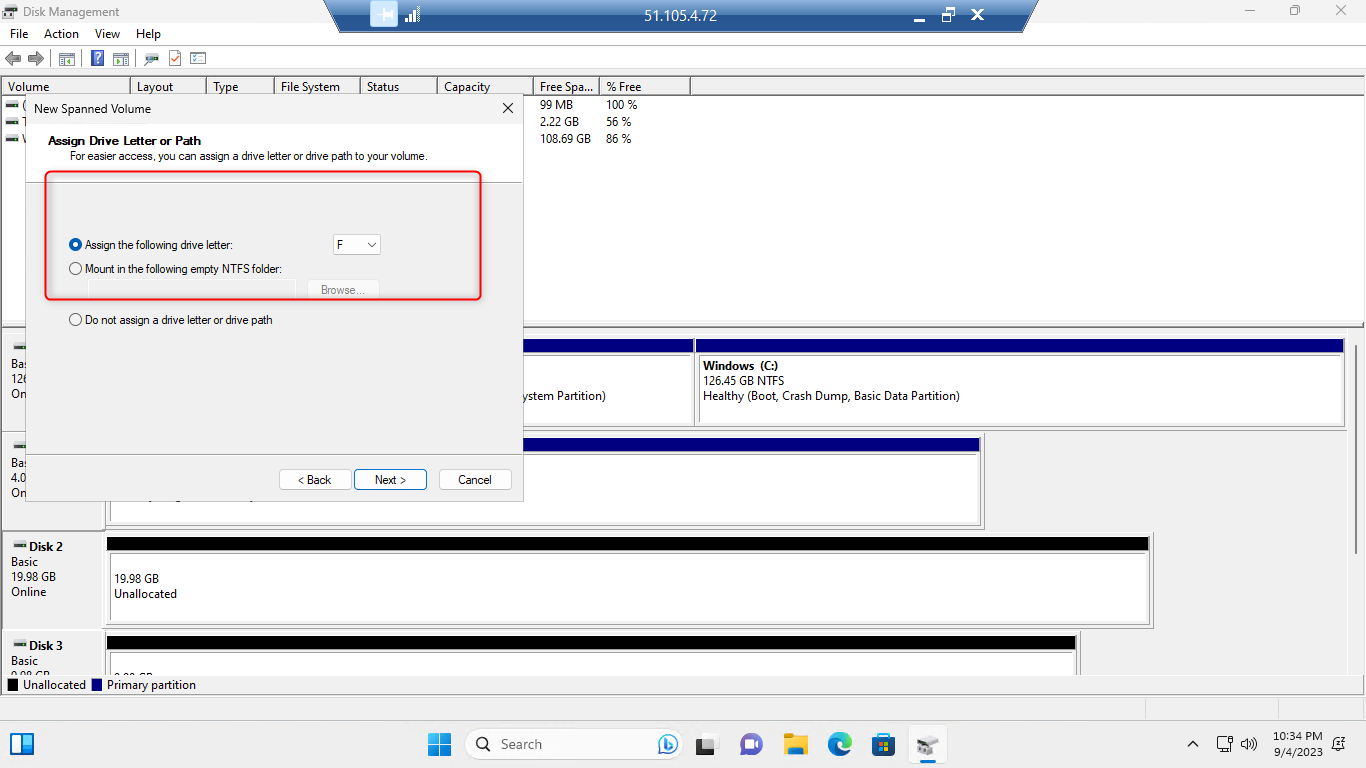
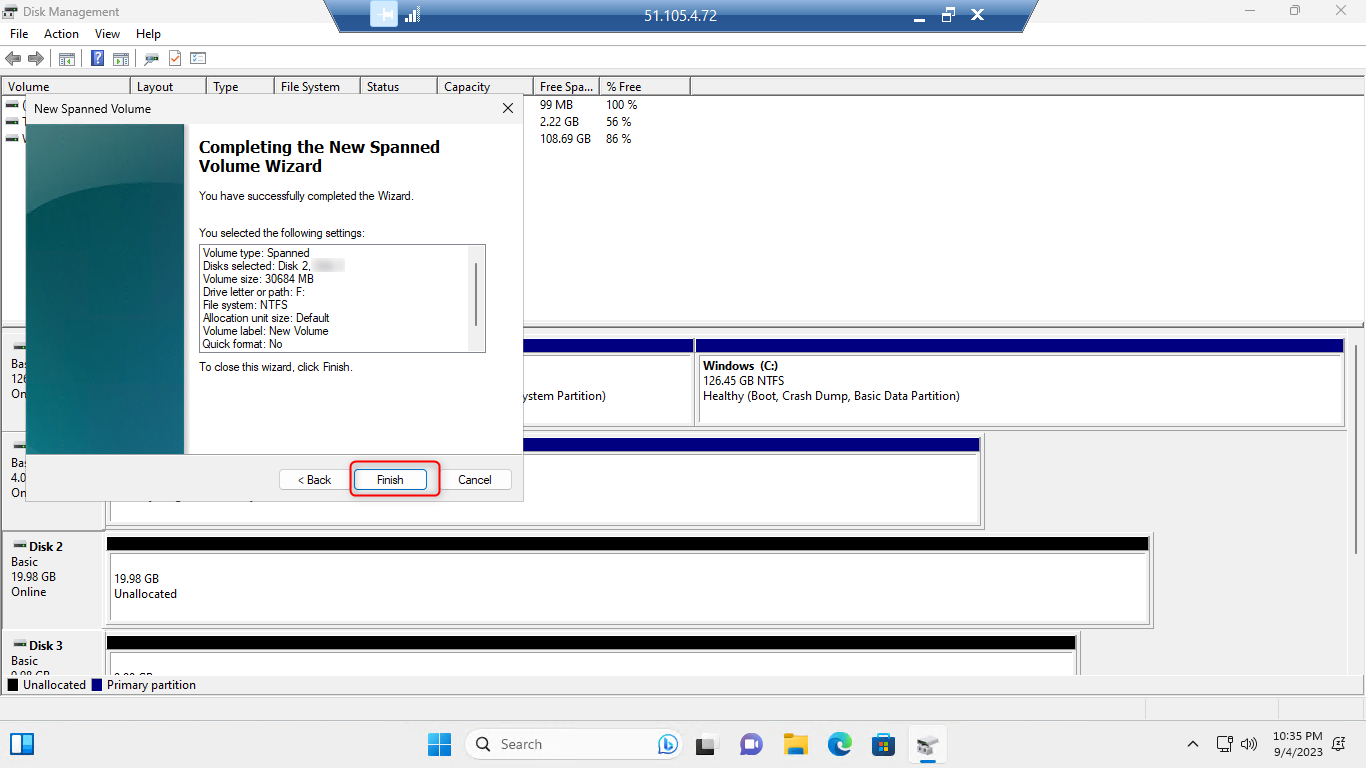
Assign a drive letter of your choice. I will be using F: for my own disk
Select format and specify file type. I will be using the NTFS
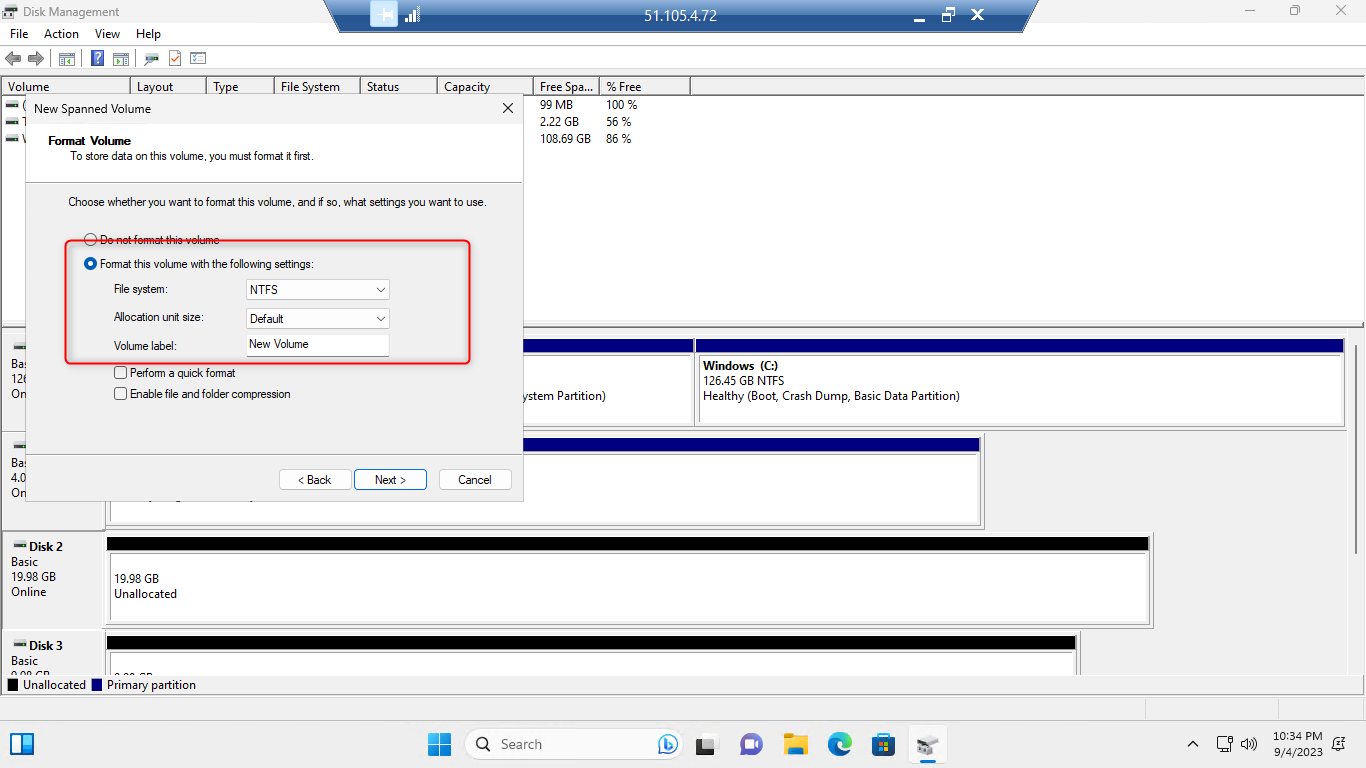
Click Finish to format your disk
Wait for the Formatting to be completed
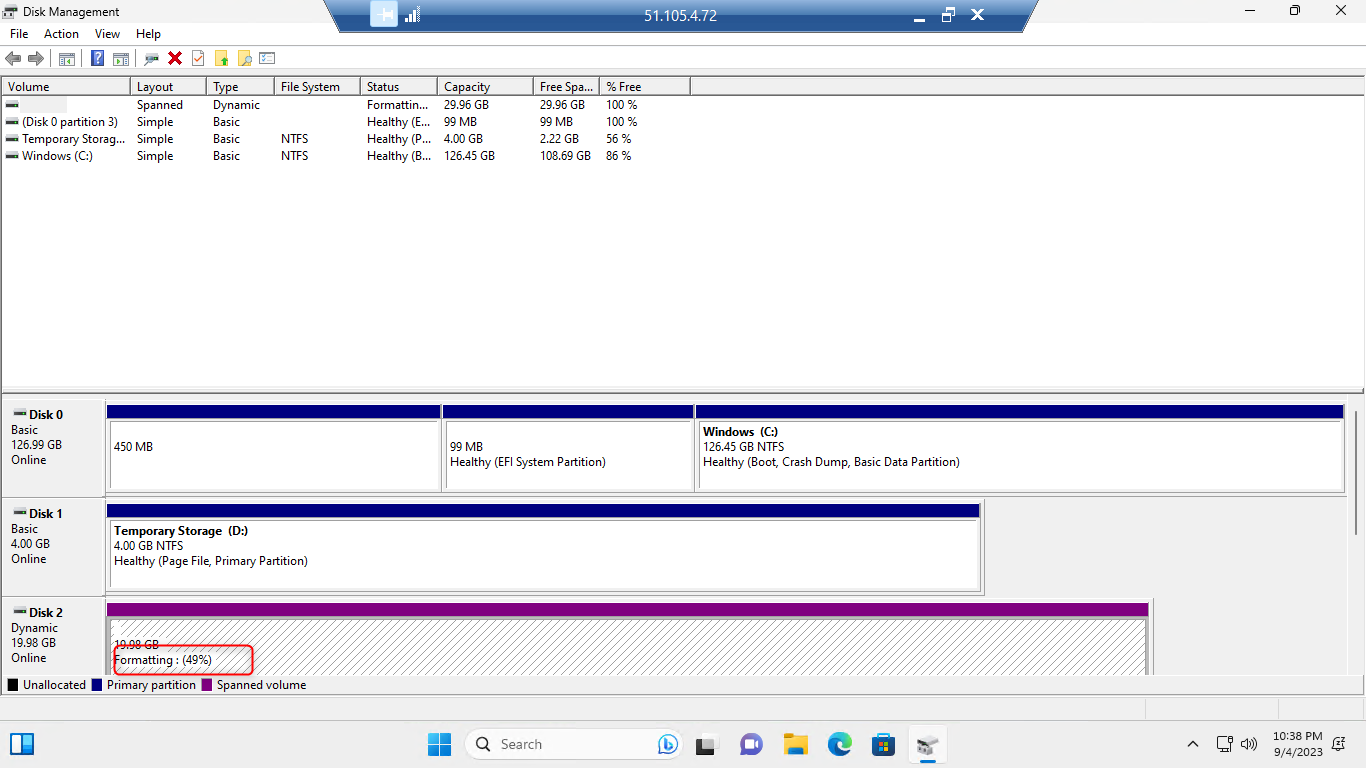
You can now chech the VM to confirm your need disk as a drive on the VM.
I hope you find this useful and educative.
Femi Moses

